Showing posts with label Pinterest. Show all posts

Thursday, August 6, 2015

{Organizing} Paper Scraps 6x6 or Smaller

Simple, simple, simple...


After getting all my stamps organized I was left with ALL these Close to My Heart plastic stamp envelopes...well scrap paper 6x6 or smaller fits right inside!

Now I let go of alot of my scraps that were smaller then 3x3 and they are being donated to my sons school. The little ones do lots of arts and crafts with them in 4K & 3K. I also let go of alot of the solid colored scraps and kept all the pretty patterned or textured pieces.

Now these are ready to store with my card making items and are even super convenient to take to a crop! YAY for less time packing and more creating time!

Tuesday, August 4, 2015

{Organizing} Stamp Storage


I've searched what seems like a million Google page searches for stamp storage and the endless pins on Pinterest and finally found a system that works for me.

Started by collecting all my stamps, ALL of them! Clear cling stamps, rubber un-mounted stamps, rubber mounted stamps & sorted them by themes (everyone might have diff themes of course). Now I will say this if a stamp set had butterflies and then sentiments like Thank You or Congrats I DID seprate them into the diff themed areas BUT say I had a stamp with candy images and then a You're so Sweet sentiment I left together. To each their own do what your brain says makes sense!

Here are my themes:
  • ALPHABETS/NUMBERS (journaling too)
  • BEACH (shells, anything water related)
  • FLORAL/BUTTERFLIES (flowers, bugs etc)
  • SENTIMENTS (thank yous, congrats, get well etc)
  • BIRTHDAY (cupcakes, cake, presents, birthday sentiments)
  • OBJECTS (kind of misc items like stamps of chairs, houses etc)


Sunday, October 6, 2013

Transformer Birthday Party {Party Time}

My son turned 4 this weekend and he requested a Transformer birthday party. With the revival of the series in recent years a lot of items weren't too hard to find online but the local stores lacked in the party planning department. So here's how things turned out:

{The invite! Made with Jinger Adams premade prefolded cards, gears washi tape, Transformer stickers, Alpha stickers and a Alpha Letters Stamps for the PARTY}


Transformer Birthday Party Cake Pan Silicone
{The cake was made using a silicone cake pan I found on Amazon and it was decorated by my very talented SIL. Party hats ended up being from the Dollar Tree}

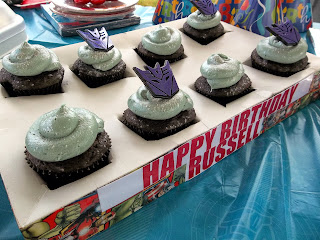
Transformer Birthday Party Supplies Cupcake Toppers
 {Also found some Transformer Ring Cupcake toppers on Amazon for the cupcakes & my SIL decorated the frosting with Platinum Edible Dust found on Amazon too!}


Transformer Birthday Party Edible Glitter
 {I made the cupcake holders using plain old white gift boxes, cut out an X where each cupcake would fit and then tape the boxes together. Then I edged the outside of the boxes with Super Hero Duct tape I found at Michael's and printed the Happy Birthday Russell on the printed and tapes it on with clear tape.}

Transformer Birthday Party Goodie Bags Crayon
{Goodie bags consisted of Dollar Tree Truck cellophane bags, some Dollar Tree Plane Kazoos, Dum Dum Lolli Pops, a Transformer Birthday Party Goodie Bags Crayon (separated from a pack of 10) & a Transformer Coloring Activity Pad}

{Best part of the party for my son was having his friends with him at the beach, one of his favorite places to be...in the water. Such a Keys kid}

Saturday, July 6, 2013

{Crafting} Mail Art

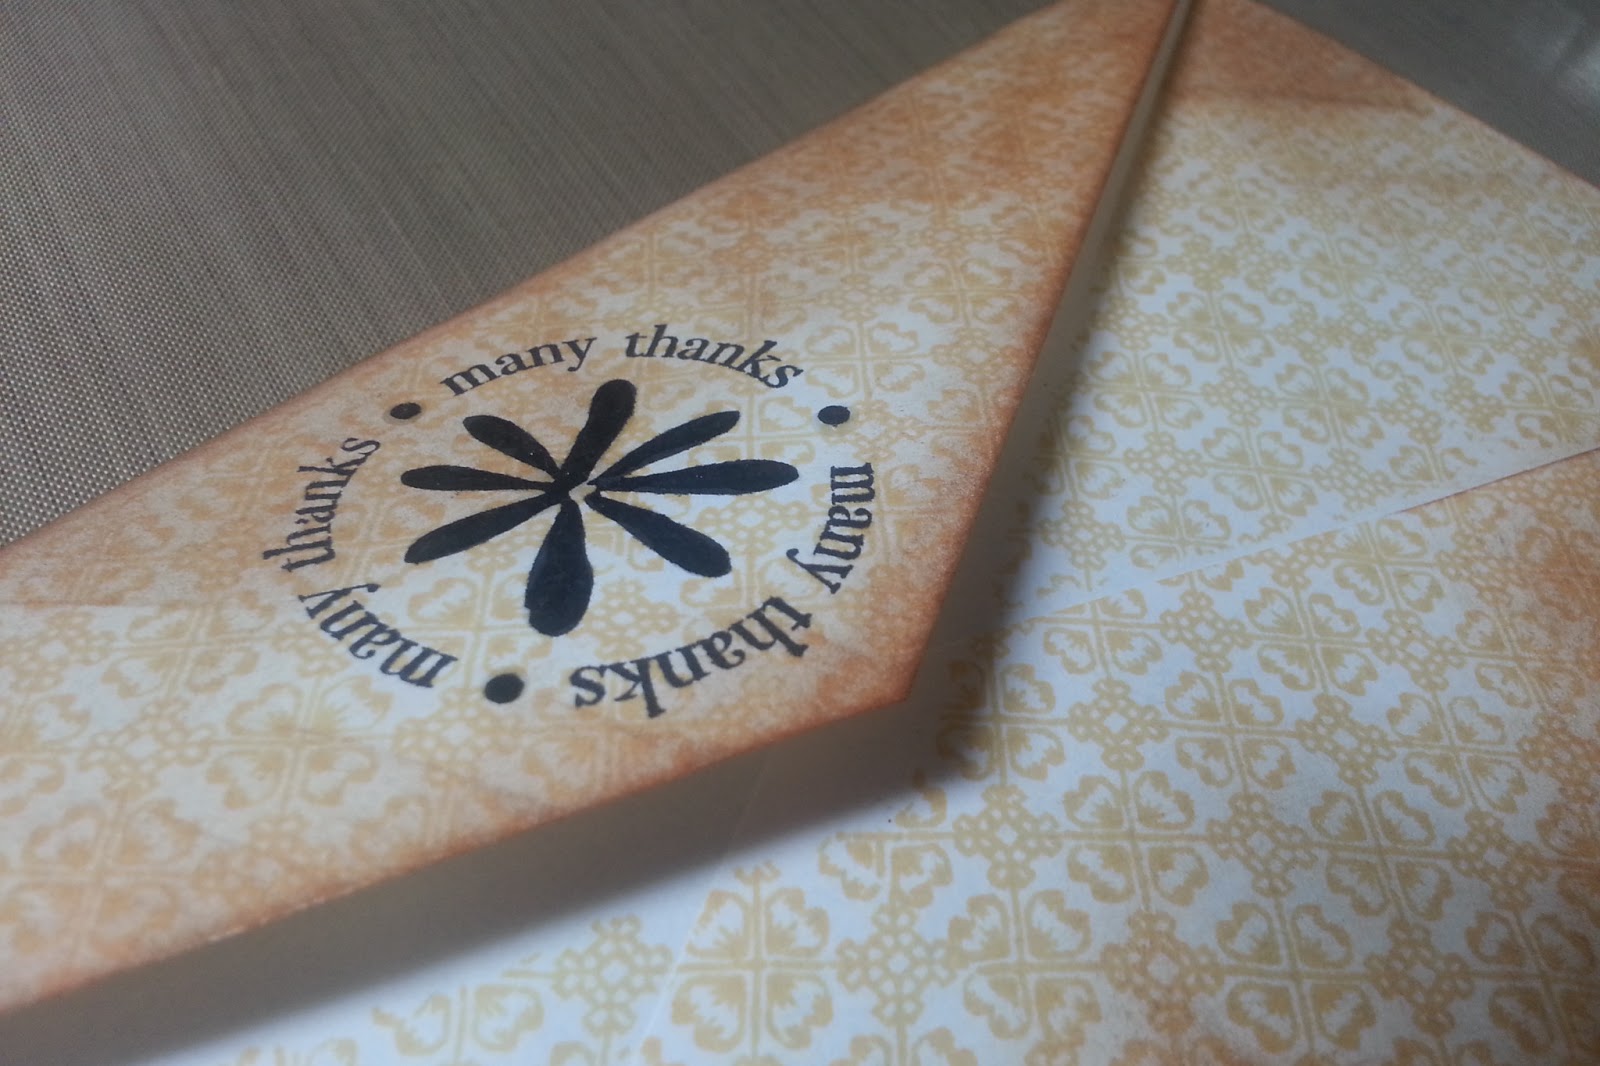
Finally sat my rear end down, pulled out some blank envelopes, a stack of stamps and ink and started creating. Ended up with MAIL ART that I am so happy to share with you!

When was the last time you mailed a LETTER? A text message or email do not stand a chance against a letter in the mail from a friend or family member. Why not start sending happy mail?

I will have these for sale at our craft booth here in the Keys next week with proceeds benefiting filling backpacks with supplies for the local schools, but I'm thinking about selling them online....what do you think?

Anyone interested?
~Danielle

 {ENJOY}


Sunday, March 24, 2013

Thursday, February 28, 2013

{Thirty One} Home Office Nook

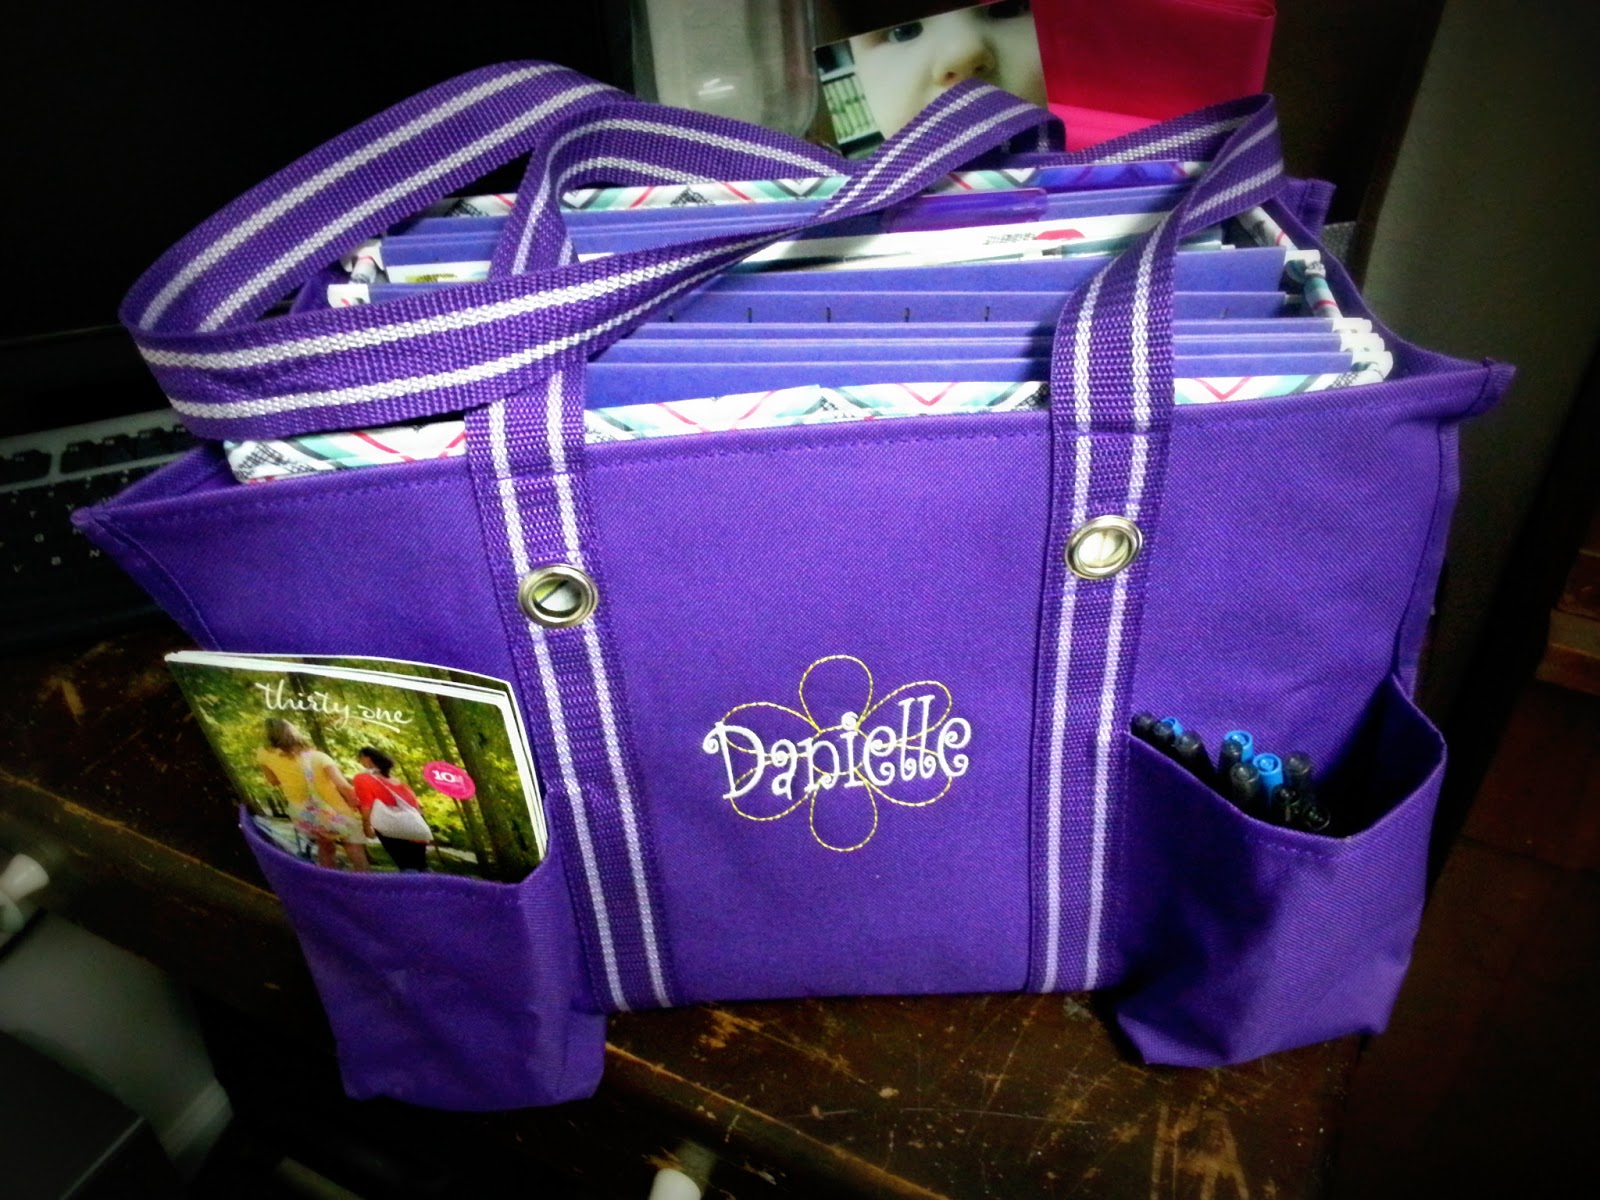
Nothing special but I wanted to share with you my little Home Office Nook with some of my most favorite Thirty One Products!

 {Fold n File}


{Organizing Utility Tote}

 {Hang Up Family Organizer and Hang Up Room Organizer}


{Keller's Creations Hanging Project of my son


 {All in One Organizer (newer version is called Keep It Caddy)}


 {Pen holder is a glass candle holder I found at a yard sale and the BIG paper clip was from Michael's}


{Hang Up Home Organizer}

Wednesday, February 13, 2013

{Valentine's Day} Fish School, Heart Pizzas & Cupcakes

Feeling like Super Mom...cupcakes and Valentine's finished for my son's daycare party. However the heart pizzas were a bust for my son I still think they tasted pretty good. Valentine's Day 2013 is almost in the bag! ha ha bag...get it? ;)

Filled the ziplocs with Gold Fish Crackers....much healthier than candy. The cupcakes are enough.

 My attempt at "Heart" pizzas. Gluten Free Chebe Pizza Crust, I thought they were tasty.


& then the cupcakes! Super cute toppers I found on Amazon and the tray is a Pampered Chef Cool & Serve with the inserts taken out, works perfect!

Thursday, February 7, 2013

{Gluten Free} Big Choco Chip Cookie

Birthday celebrations, Valentine's Day or walking around the mall there are times when that tempting "LARGE PLATE SIZED COOKIE" comes across your path and if you are like me, Gluten Free, you just *sigh* and pass on by...NO MORE! {LOL}

I wouldn't attempt this with just any pan but with my White Ceramic 8" Saute Pan from Pampered Chef it came out perfect! So here's how it went down...

{Preheat the oven for 350 degrees....Collect ingredients. I used the Betty Crocker Gluten Free Cookie Mix from Publix. Straight from the box you need one stick of soften butter, 1 ts Vanilla, 1 egg mixed together, then add the powder mix.}


{The mix will be stiff like a regular cookie dough...pat it down into the pan pretty firmly. DO NOT add anything to the pan, DO NOT spray it with anything and DO NOT grease it...trust me
Bake at 350 degrees for at least 25 minutes and check to see if it's browning on top, at 25 minutes I put it in for another 10 minutes and was happy with the browning}

{When you remove the pan let it stand and cool completely! THIS IS THE HARD PART! I couldn't stand looking at this big giant yummy gooey cookie for long, I don't eat sweets like this very often so this was tempting.}

{TADA! See what I mean by letting it cool completely...mine cracked a bit on the side but when completely cooled this puppy would have been perfect! It didn't stick at all to the pan and slide out quite easily. Could be decorated with a cool whip, cream cheese mixture (cup of each) and using the Easy Accent Decorator for the application I was just too anxious to eat it! Next time I'll have a decorated piece to show}

Saturday, January 26, 2013

{Crafty} Crib Springs and Washi Tape

If this is what I could do craft wise on a sick day then I wish I could get to do crafting on a day where I feel alot better.

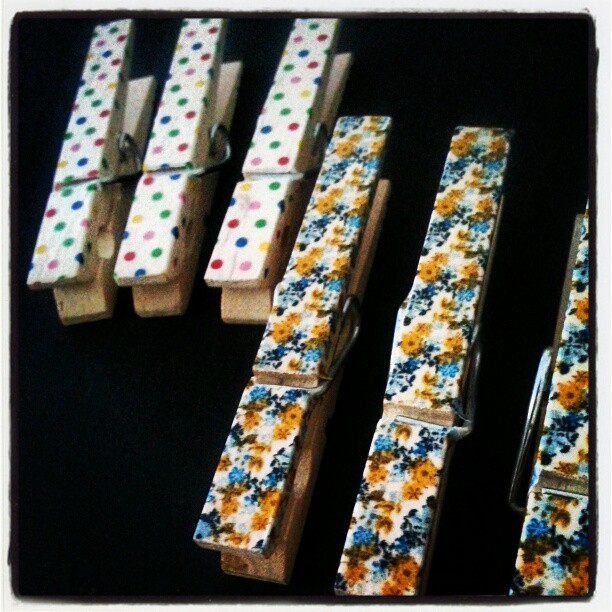
Took my son's old spring from his crib and hung it up on the wall behind the couch in the livingroom and am attaching his baby photos chronologically using Washi taped clothes pins. Simple Simple ;)


Saturday, January 19, 2013

{Pinterest} Fresh Fruit Sugar Cookie Cups

I want to start off with my inspiration found online by a friend that requested these for her Baby Shower...and well I love a challenge.


INSPIRATION SITE: http://www.daydreamkitchen.com/2012/09/fruit-pizza/

Friday, October 5, 2012

{Family} Happy Birthday to the love of my Life! He's 3 today!

My little boy is THREE today! So much has happened over the last three years and I'm the kind of Momma that likes to make a BIG stink about birthdays. We're doing a Go Diego Go themed birthday party over the weekend and a little daycare cupcake day today.

Saw this idea on Pinterest, no doubt, and was so excited to try it out! However I have a twist with the cupcakes...there are m&m's inside! Quick and easy...baked up boxed chocolate cake mix (I love love love my Cupcake Stone), let them cool, cut out the centers added m&m's and iced them! I tinted the icing as green as I could...something for me to master later on, but for now I imagine these will be gobbled up by all the little kids at daycare today.

The tray I ALWAYS use for transporting cupcakes is my Cool and Serve Tray. It comes with cooling inserts for Deviled Eggs or as a flat surface to use with the Clear Veggie Trays which are all removable and then there's lots of space for transporting cupcakes

{Danielle}


Wednesday, September 26, 2012

{Gluten Free} Easy Cheesy Bread

Let me just say that Gluten Free Bisquick is my #1 love, just using the pizza dough recipe on the side of the box, the seasoning I use is the Garlic Parmesan Dipping Seasoning and adding a 1/2 cup of sour cream to the mix makes a pretty great pizza base. This time all I added was a thinly sliced tomato (had one in the fridge but it's not required), a block of Mozzarella cheese (the soft kind that is shrink wrapped), and more Garlic Parmesan Dipping Seasoning on top.

Baked at 425 degrees on a Metal Baking Sheet for approx 17 minutes....set it for 10 minutes and check then I baked it for another 7 minutes and it was perfect!


Monday, September 17, 2012

{Scrapbook} Scrap on a Dime Baby Shower Album (Keller's Creations)

At the CKC in Jacksonville I took the Scrap on a Dime class by Keller's Creations for the first time. We did a full 12 page album in an hour. Yes completed in the hour! Of course you could have embellished the heck out of it and that's just what I did when I got home and decided to do an album for a friends' baby shower gift. I took the same size papers cut out of only 4 pieces of scrapbook paper to make the entire 12x12 (12) page album! I embellished with some pink ribbon, pink flowers, stickles, buttons and alpha stickers. On the front of the album I used chipboard alpha letters and tied some ribbon on the spine.

It was so much fun making something girly since I'm usually into Toddler Boy mode. and Only took me about a total hour and a half between nap times and bedtime for the toddler. I hope you enjoy the pictures and if you are interested in a Scrap it Fast album please check out Keller's Creations! They have some amazing quick and easy hanging creations, albums, tag books etc. Lots to check out!

Keller's Creations is also hosting a Crop Weekend in February that I WILL be attending for my birthday.
Check it out here! Great time with tons of crop space, goodies, classes, giveaways etc.